This guide will walk you through creating a custom Single Product Template using PixeBuilder. This template acts as a "master design" that will automatically apply to all your products, ensuring a consistent and professional look across your online store.
Step 1: Navigating to the Template Builder
Before we build the design, we need to create the file where the design lives.
- Log in to your WordPress Dashboard.
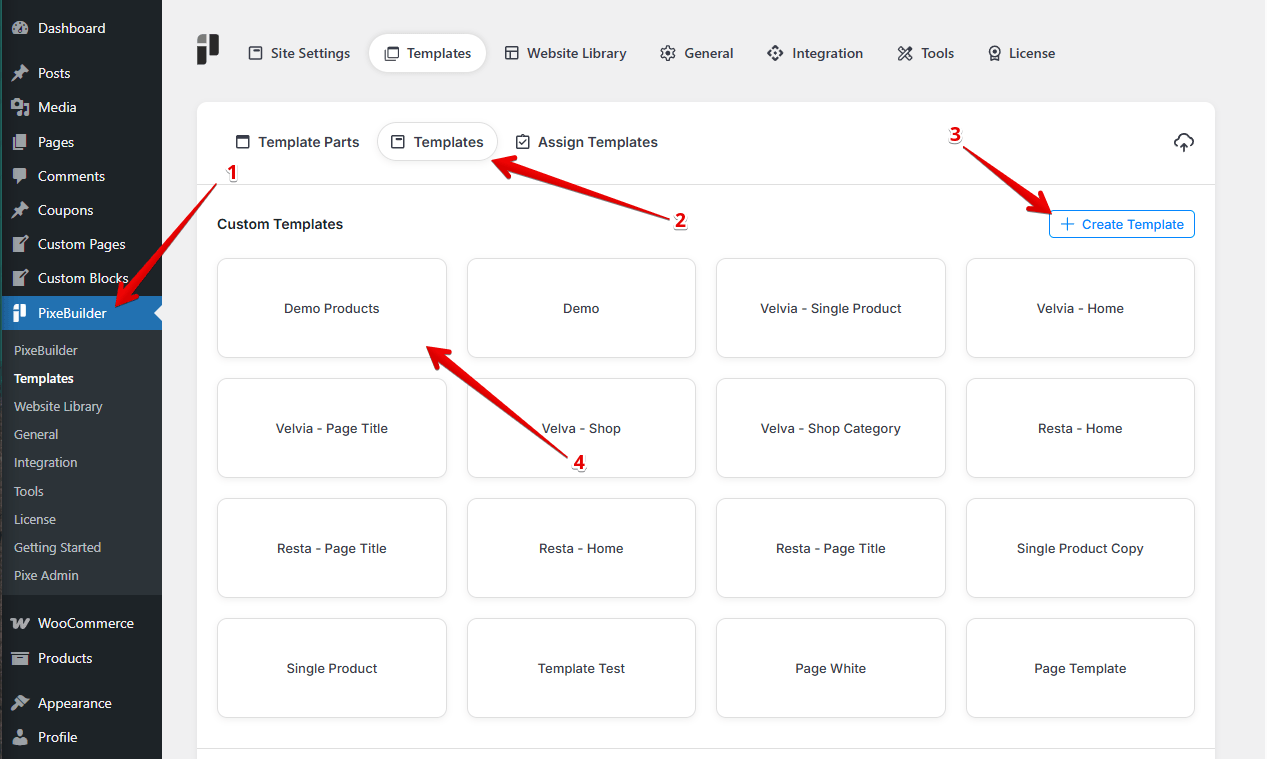
- Look for PixeBuilder in the left-hand sidebar menu.
- Click on Templates, then select the Templates tab at the top.
- Click the blue [+ Create Template] button.
- Name your template (e.g., "Demo Product") and hit the Create button.
Step 2: Configuring Global Page Settings
Now that you are in the editor, we need to set the "skeleton" of the page. The headers, footers, and overall width.
A. Assigning Components
Components are the parts of your site that stay the same on every page, like the menu at the top and the info at the bottom.
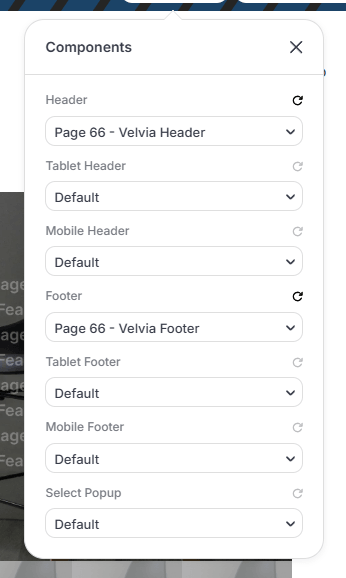
- Open the Components menu.
- Header: Choose your preferred header from the dropdown list.
- Footer: Choose your preferred header from the dropdown list.
- Leave Tablet and Mobile settings as Default; they will automatically adjust based on the main header/footer.
B. Layout Settings
This defines how much space your content takes up on the screen.
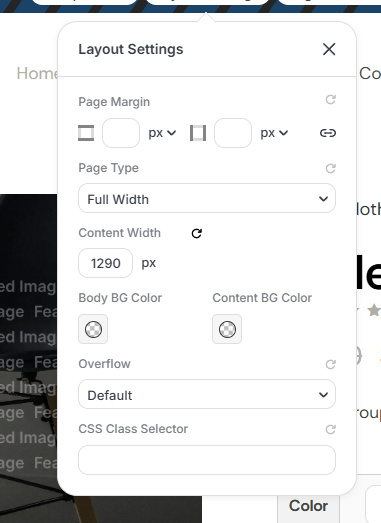
- Open Layout Settings.
- Page Type: Set to Full Width.
- Content Width: Set to 1290px. This ensures your product info doesn't stretch too wide on large monitors, keeping it easy to read.
Step 3: Building the Product Layout Structure
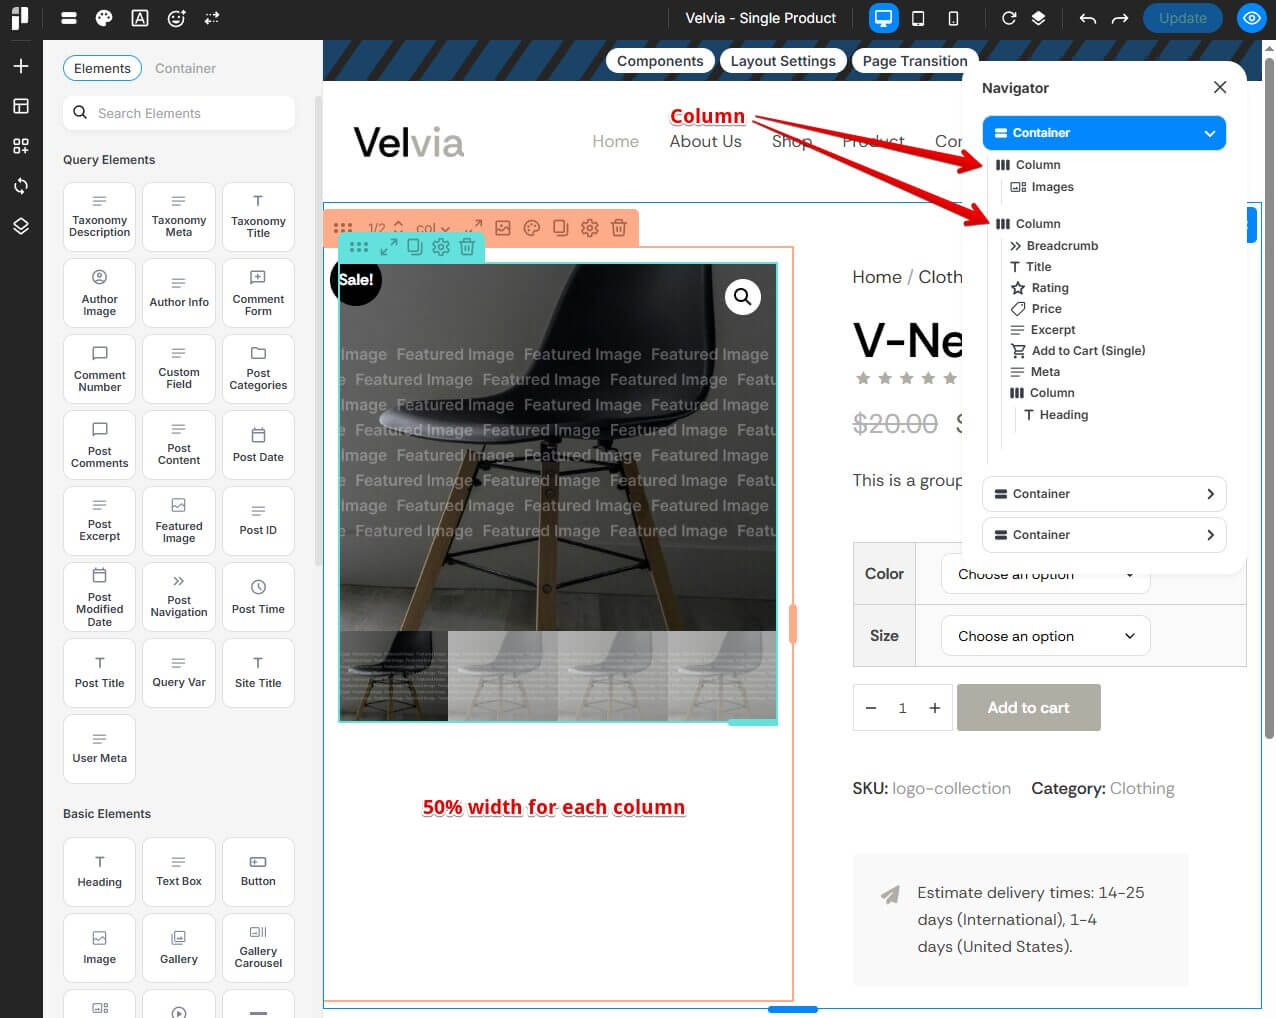
We use a Container to hold everything and Columns to split the page side-by-side.
- Add a Container: Drag a Container element onto the page.
- Add Columns: Inside that container, add two Columns.
- Set Width: Click on each column and set their width to 50%. This creates a perfect split-screen effect.
Step 4: Adding Product Elements
Now we fill the columns with information pulled directly from your WooCommerce products.
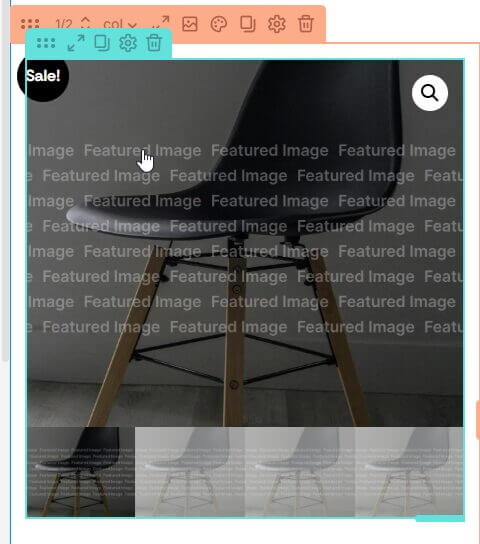
Left Column: Visuals
In the left column, we want the customer to see the product.
- From the WooCommerce Single Product Items menu, drag the Images element into the left column. This will automatically display your product’s main image and gallery.
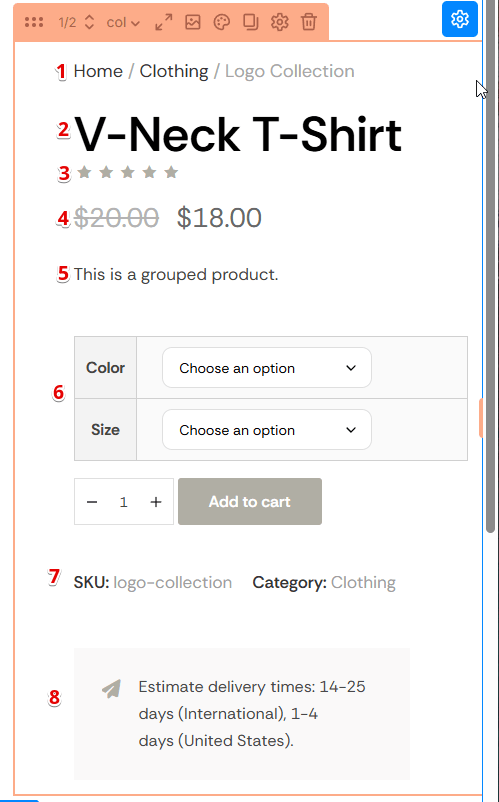
Right Column: Product Details
In the right column, we will stack the information. Drag these elements in the following order:
-
Breadcrumb: Shows the path (e.g., Home > Shop > Shoes).
-
Title: Automatically displays the name of the product.
-
Rating: Shows the star ratings from customer reviews.
-
Price: Displays the current selling price.
-
Excerpt: This is the "Short Description" of your product.
-
Add to Cart (Single): Adds the quantity selector and the "Buy" button.
-
Meta: Shows the SKU and Categories.
-
Heading: Use this for a "Product Features" or "Description" title.
Step 5: Assigning Single Product Template
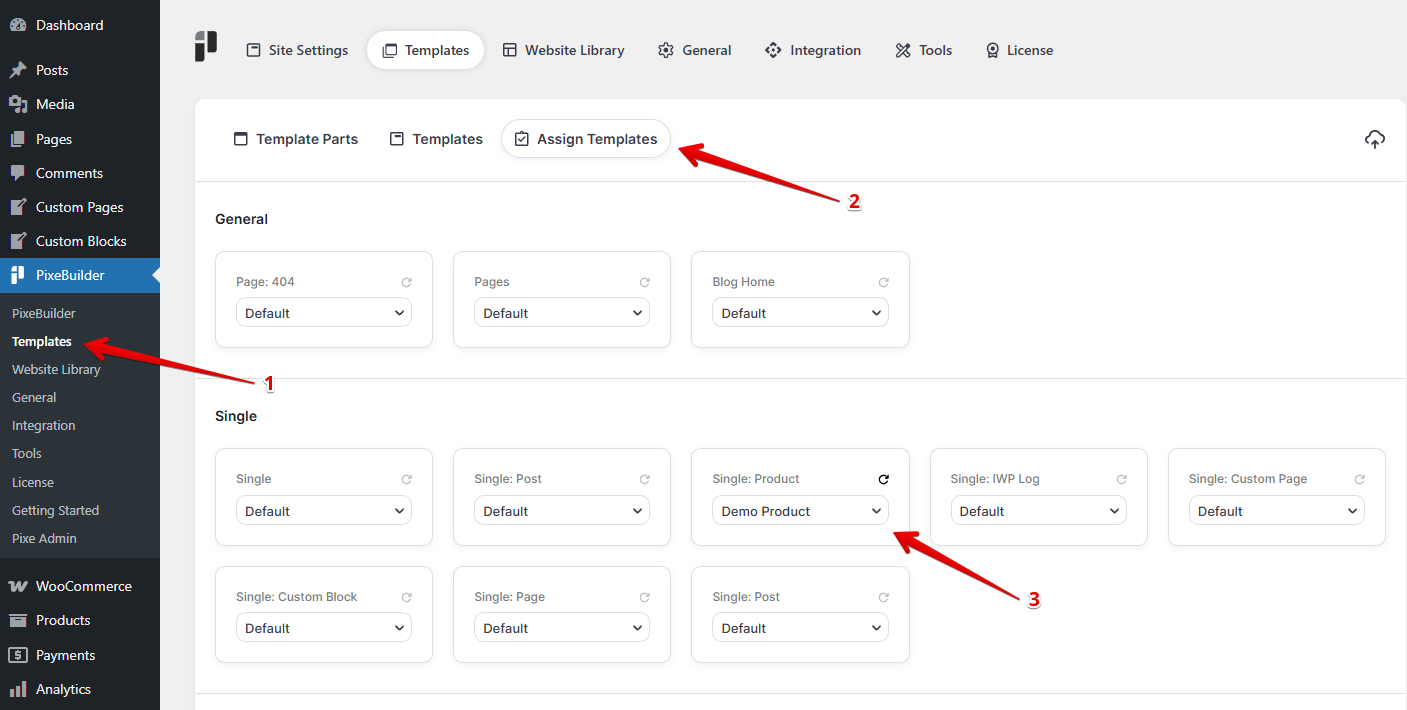
To apply a custom layout to a specific single product on your website, follow these three steps as indicated in the interface:
Access the Templates Menu
On the WordPress sidebar, navigate to the PixeBuilder menu and click on the Templates sub-menu. This will open the main template management dashboard.
Select the Assign Templates Tab
At the top of the workspace, ensure you are on the Templates tab, then click the Assign Templates button. This section allows you to map your saved custom designs to global WordPress locations (like 404 pages or specific post types).
Map Your Templates
Locate the specific post type or page category you wish to update. Use the dropdown menu within the card to select your desired custom template.
-
Example: To set a custom look for your shop, go to the Single: Product card and select your template (e.g., "Demo Product") from the list.
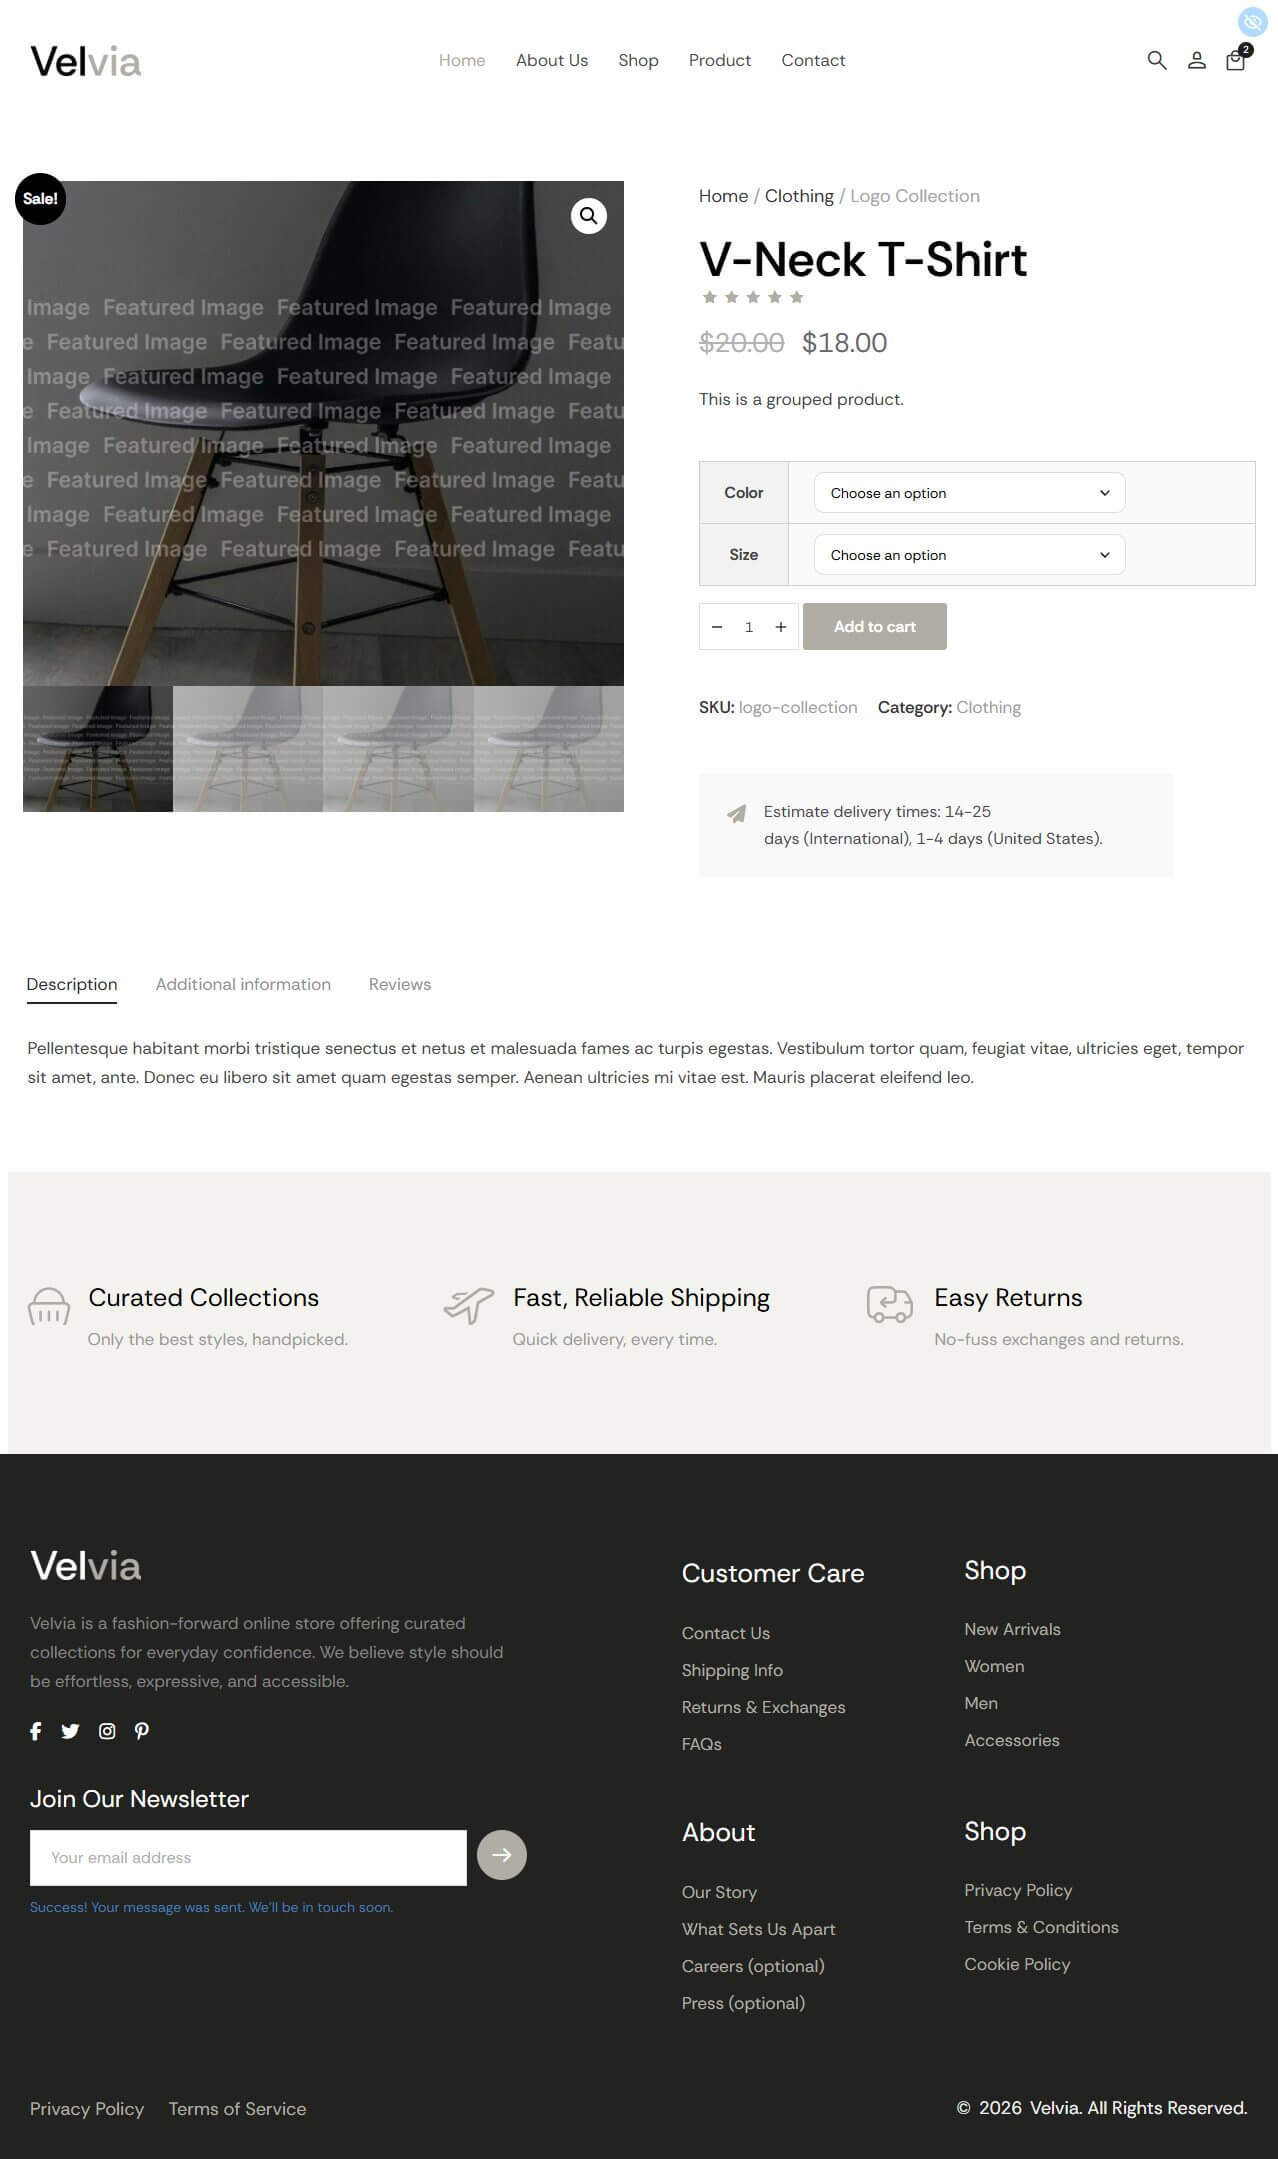
Single Product Template Result Page