The Font Manager in PixeBuilder allows you to define consistent typography styles across your website by using Typo Presets. This helps streamline font usage, improve design consistency, and simplify global updates.
You will need to add Google Font first.
Typo Preset Overview
Each preset (Primary, Secondary, Text, Button, H1–H6) can be configured with specific font settings for Desktop, Tablet, and Mobile views.
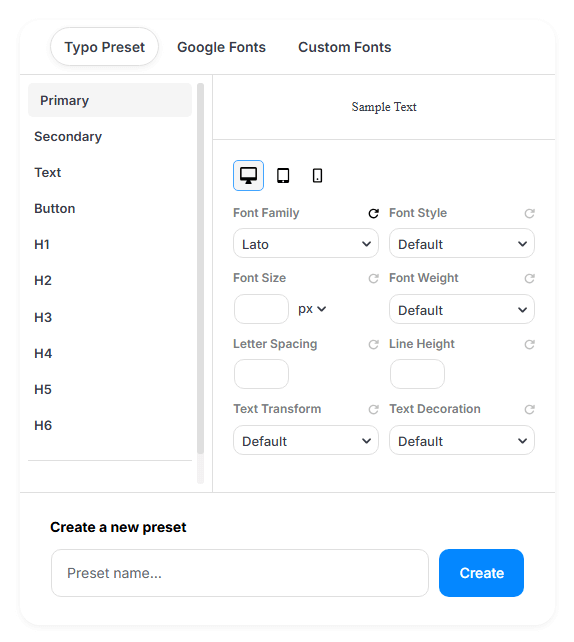
Available Settings:
-
Font Family – Choose from Google Fonts or custom fonts.
-
Font Style – Regular, italic, etc.
-
Font Size – Set a specific font size (in px/em/rem/vw).
-
Font Weight – Control how bold the text appears (e.g., 400, 600, 700).
-
Letter Spacing – Space between characters.
-
Line Height – Vertical spacing between lines of text.
-
Text Transform – e.g., uppercase, lowercase, capitalize.
-
Text Decoration – e.g., underline, line-through.
Creating a New Preset
- Scroll to the bottom.
- Enter a name in the “Create a new preset” field.
- Click Create to generate a new preset you can customize.
Responsive Control
At the top of the style section, toggle between Desktop, Tablet, and Mobile to fine-tune typography across devices for a fully responsive experience.
Google Fonts Overview
The Google Fonts tab allows you to manage and add fonts from the official Google Fonts library for use across your site. Please make sure to add a Google Font first, then adjust the Google Font display settings later.
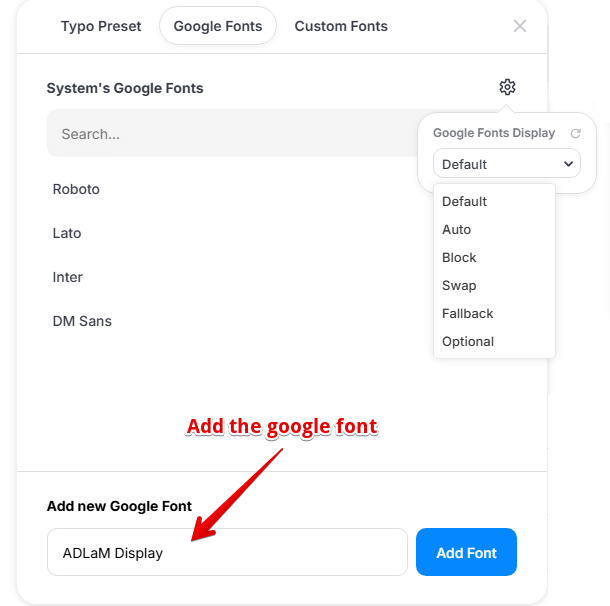
Google Fonts Display Settings:
- Default – Uses the browser's default behavior
- Auto – Automatically optimizes font loading
- Block – Delays text rendering until the font is loaded
- Swap – Uses a fallback font until the custom font is ready (best for performance)
- Fallback – Prioritizes speed, may skip the font if too slow
- Optional – Loads if fast, skips if not
Custom Fonts Overview
The Custom Fonts tab lets you upload and use fonts either that are not available in Google Fonts or that are necessary to make your site compliant with GDPR.
This is useful when your design uses a unique font not found in Google Fonts. Just upload and define the styles you need easy and flexible!
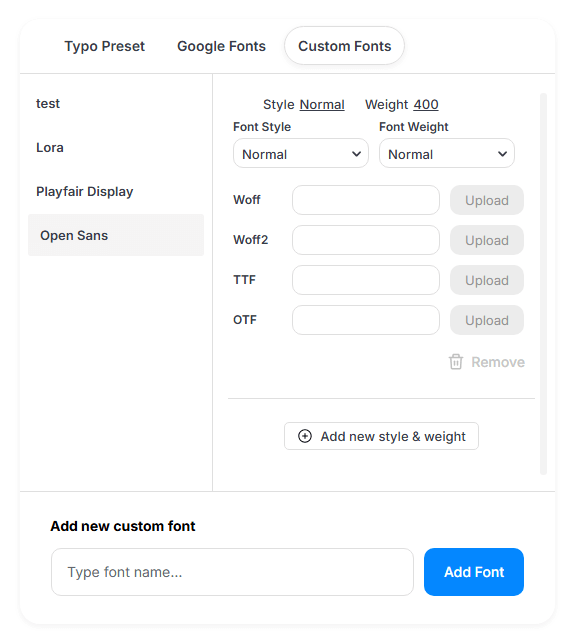
Custom Fonts Settings:
-
Add your custom font name in the “Add new custom font” field.
-
Click “Add Font”.
-
Click “Add new style & weight” to define:
- Weight (e.g. 400, 600)
- Style (e.g. Normal, Italic)
*You must upload a separate file for each font weight and style.