Creating a custom shop page can feel like building a puzzle, but with PixeBuilder, it’s a straightforward process of stacking "blocks" together. This guide will walk you through creating a Shop Category Template, the page your customers see when they browse specific types of products.
Step 1: Navigating to the Template Builder
Before we build, we need to create the canvas.
-
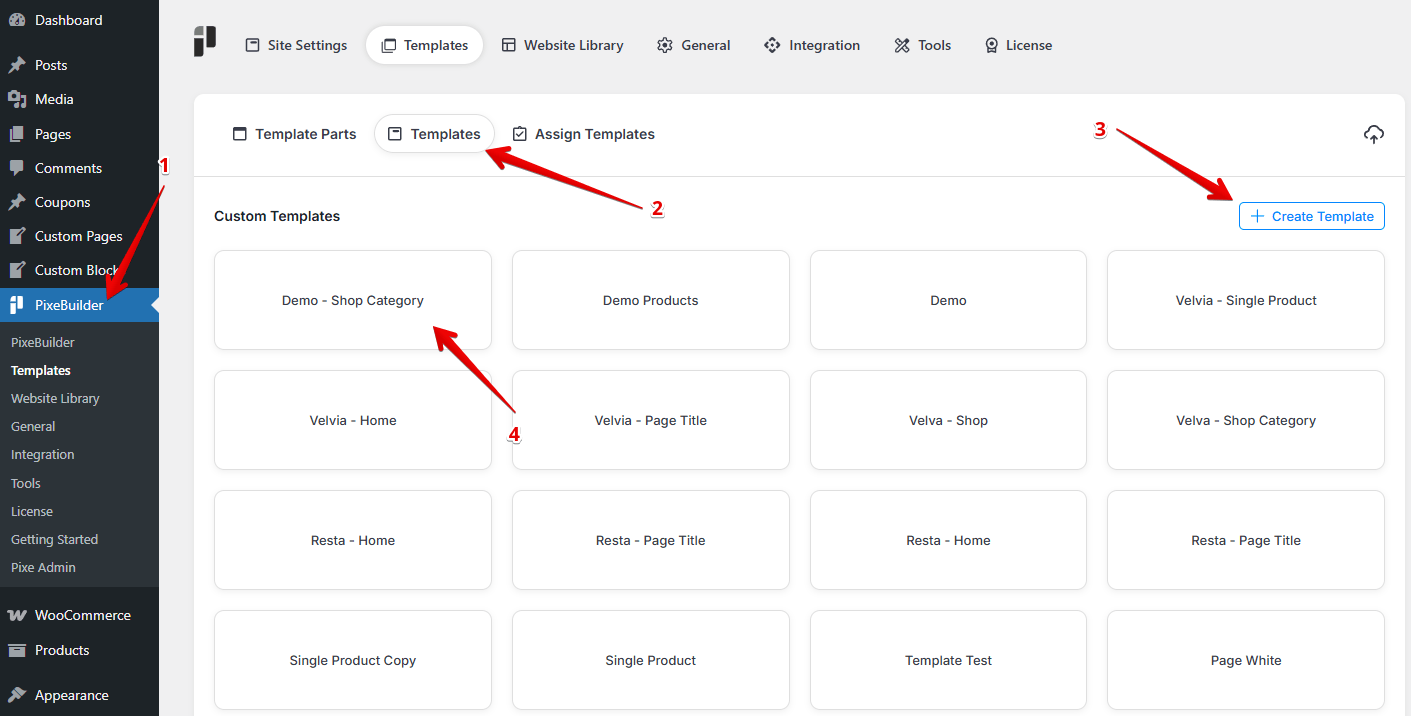
Open PixeBuilder: On the left-hand menu of your WordPress Dashboard, click on PixeBuilder (indicated by the red arrow in the image below).
-
Go to Templates: Click the Templates tab at the top of the screen.
-
Create New: Click the blue + Create Template button in the top right.
-
Name It: For this exercise, name your template "Demo - Shop Category" and save it.
Step 2: Setting the Page Components
Components are the "frames" of your website—the parts that usually stay the same on every page, like the top navigation (Header) and the bottom info (Footer).
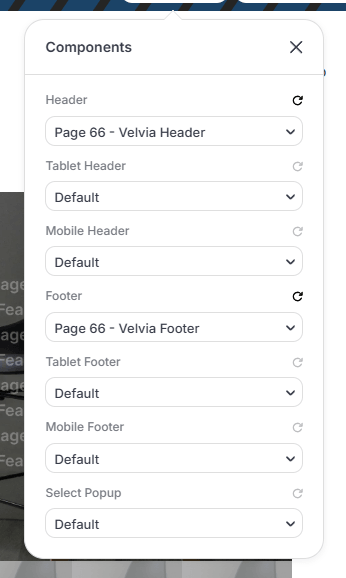
In the Components popup:
- Header: Choose your preferred header from the dropdown list.
- Footer: Choose your preferred header from the dropdown list.
- Mobile/Tablet: Leave these as Default so the site automatically adjusts for phones and tablets.
Step 3: Configuring the Layout
The Layout settings determine how much space your content takes up on the screen.
- Page Type: Set this to Full Width. This allows your product list to breathe and use the entire horizontal space of the browser.
- Content Width: Leave this empty (default) to follow the global site settings.
- Background Colors: Keep these transparent or default to maintain a clean, professional look.

Step 4: Building the Page Structure
We are going to build two main sections (Containers).
Container 1: The Page Intro
This section tells the customer where they are.
- Heading: This will display the custom name identified by you.
- Breadcrumb: A small text path (e.g., Home > Shop > Shoes) that helps users navigate back easily.
Container 2: The Shopping Area
This is the "engine room" where products are displayed.
- Column: Inside this container, we add a column to organize our tools.
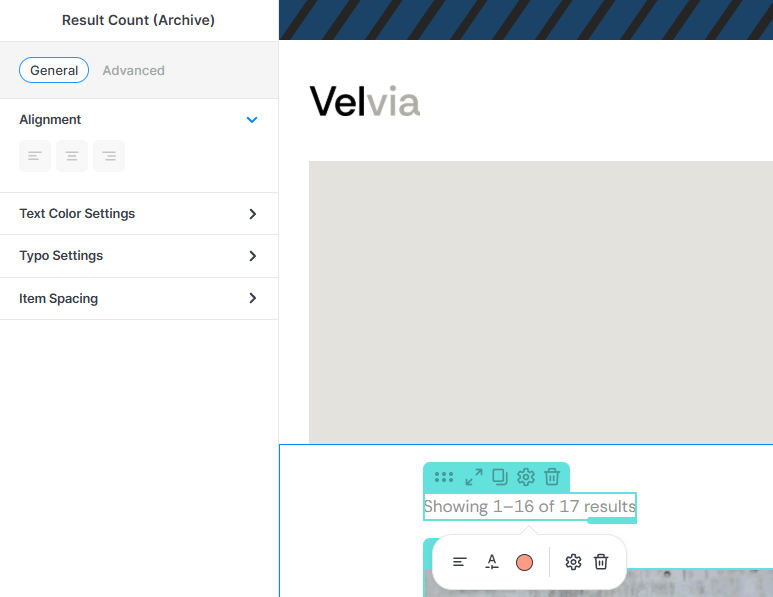
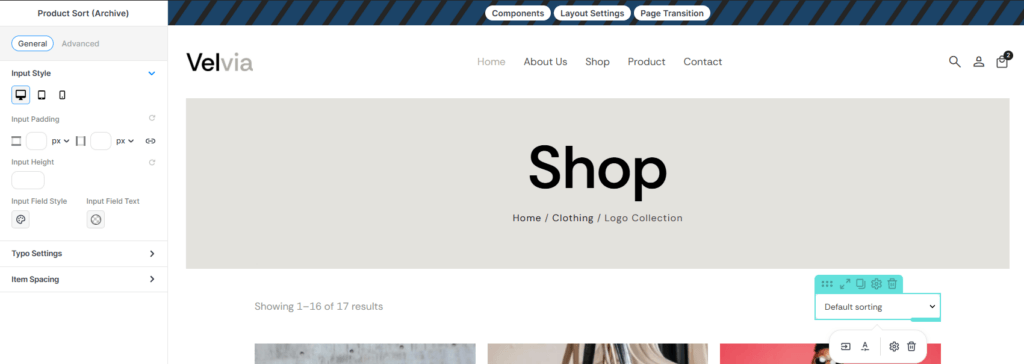
- Result Count (Archive): Shows how many products are available (e.g., "Showing 1–12 of 50 results").

- Product Sort (Archive): Adds a dropdown menu so customers can sort by "Price," "Newness," or "Popularity."

- Result Count (Archive): Shows how many products are available (e.g., "Showing 1–12 of 50 results").
- Product List (Shop): This is the most important element. It sits underneath the column and pulls in your actual products from WooCommerce
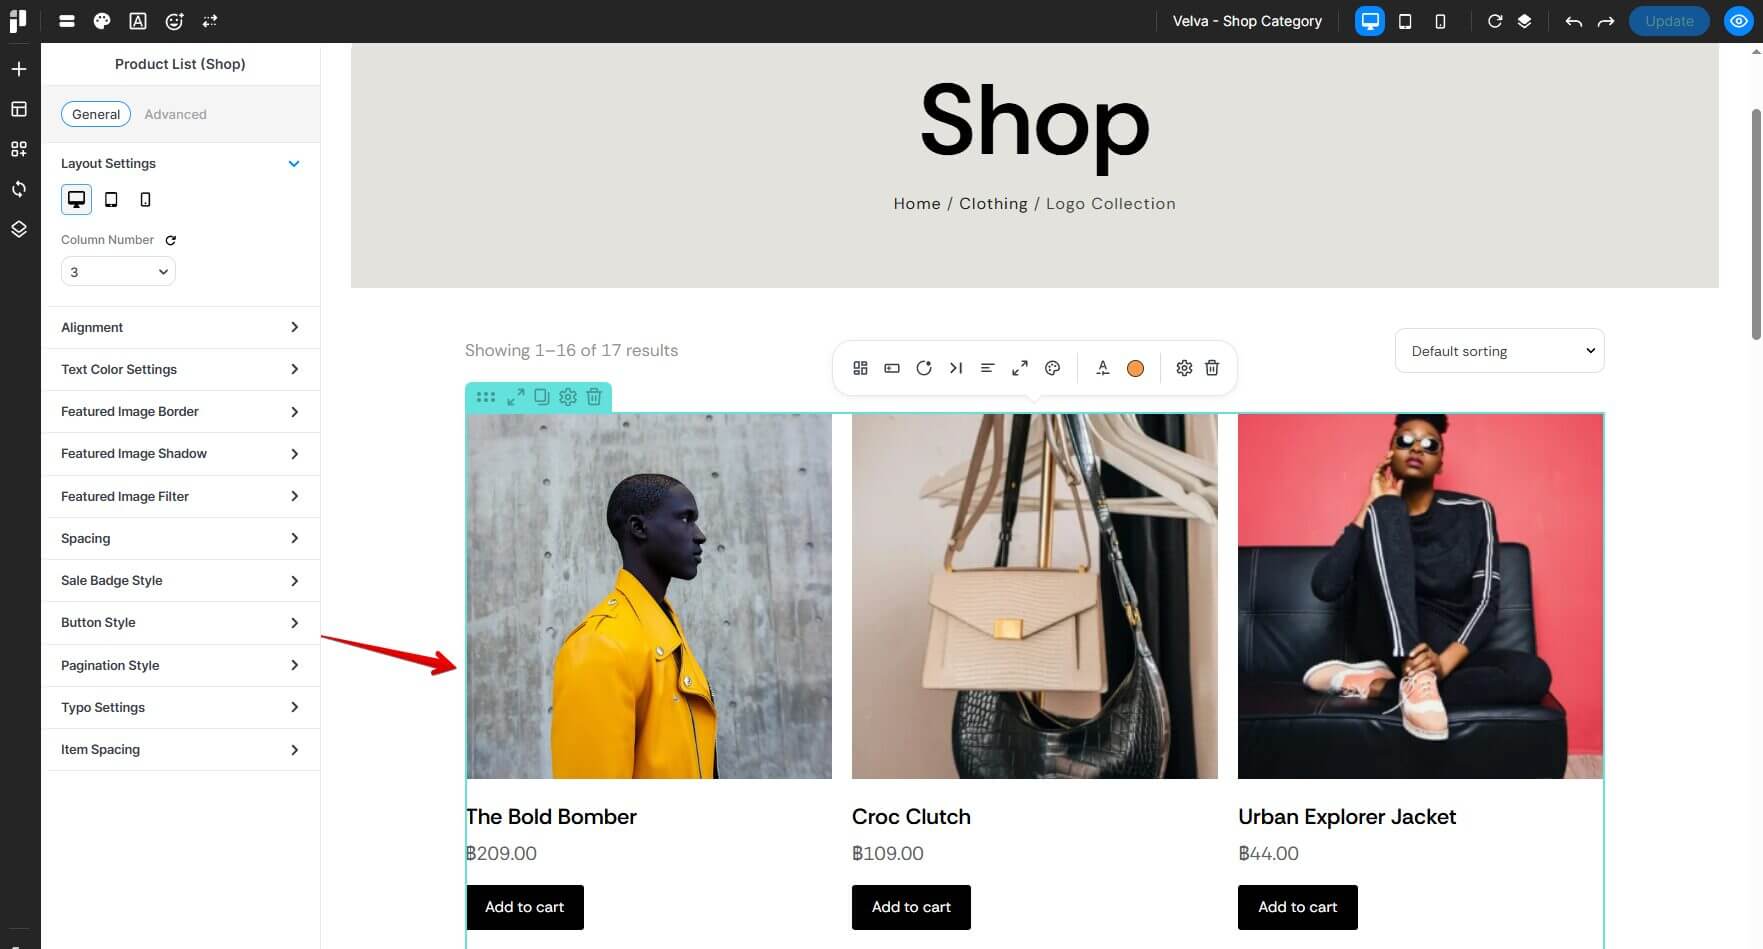
Step 5: Customizing the Product List
Once your Product List (Shop) element is in place, you can fine-tune how it looks using the sidebar settings. Here is a breakdown of the key areas:
- Layout & Alignment: Decide how many products appear in a row (usually 3 or 4).
- Featured Image Settings: You can add borders, shadows, or filters (like making images slightly brighter) to make your products "pop."
- Sale Badge Style: Customize the "SALE!" bubble that appears on discounted items.
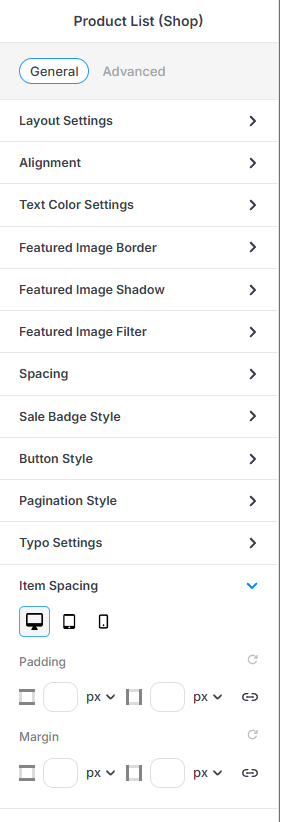
- Item Spacing: This is crucial. Use the Padding and Margin settings to ensure there is enough white space between products so the page doesn't look cluttered.
- Pro Tip: When adjusting Item Spacing, notice the icons for Desktop, Tablet, and Mobile. You can set different spacing for each device to ensure your shop looks great on a 24-inch monitor and a 6-inch phone screen!
Step 6: Set the Product Archive in Templates
After building your beautiful designs, the final step is to tell WordPress exactly where to use them. This is called Assigning Templates.
This step ensures that whenever a customer clicks on a specific category (like "Shoes" or "Accessories"), they see the custom layout you designed.
-
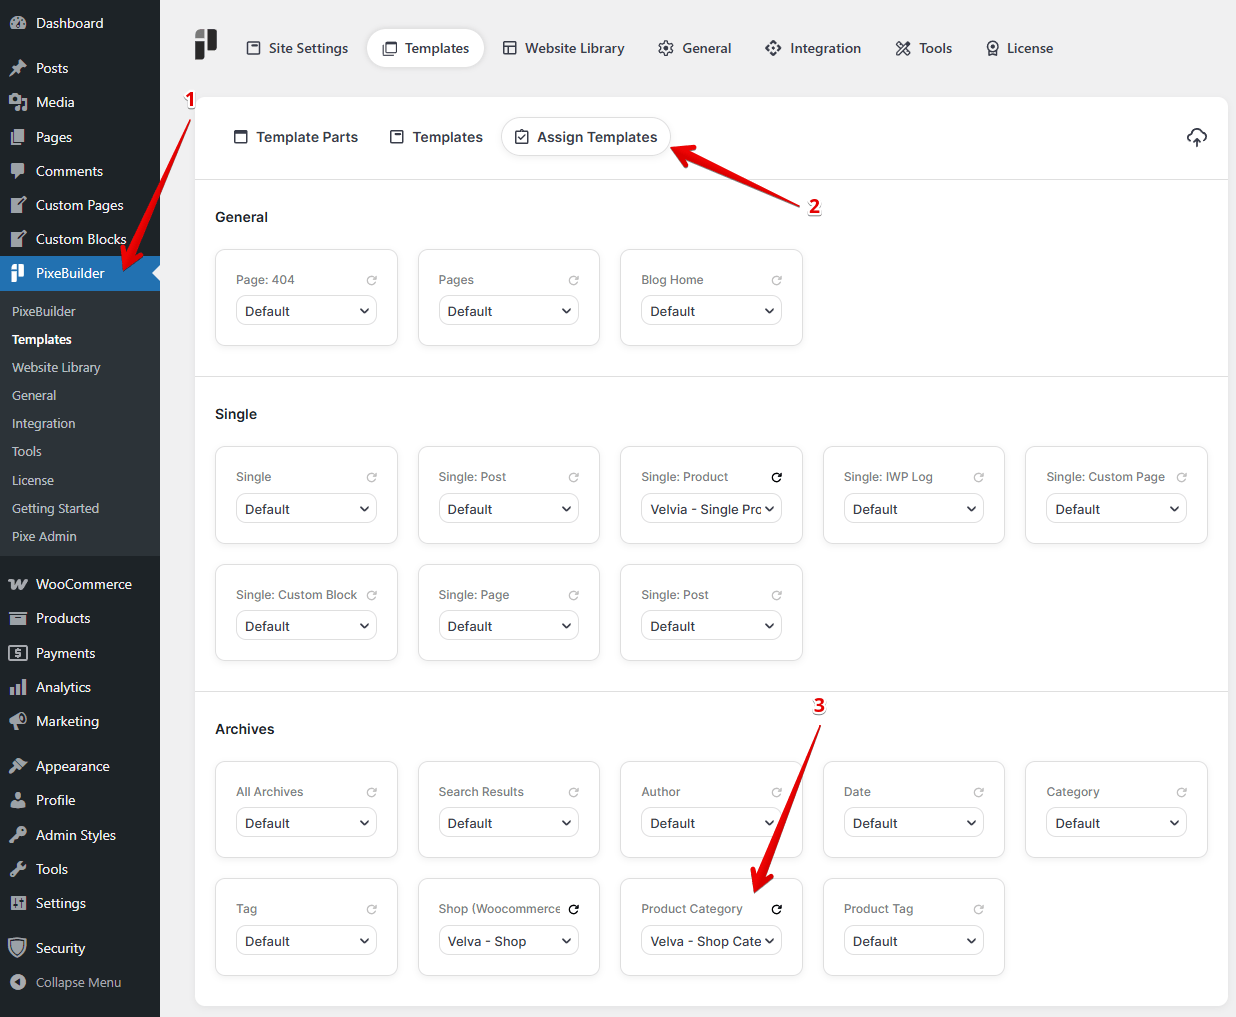
Navigate to PixeBuilder: Click the PixeBuilder icon in your WordPress sidebar.
-
Assign Templates: Click the Templates tab at the top, then select the Assign Templates sub-tab.
-
Locate Product Category: Scroll down to the Archives section. Find the box labeled Product Category.
-
Select Your Design: Click the dropdown menu and select the template you created.
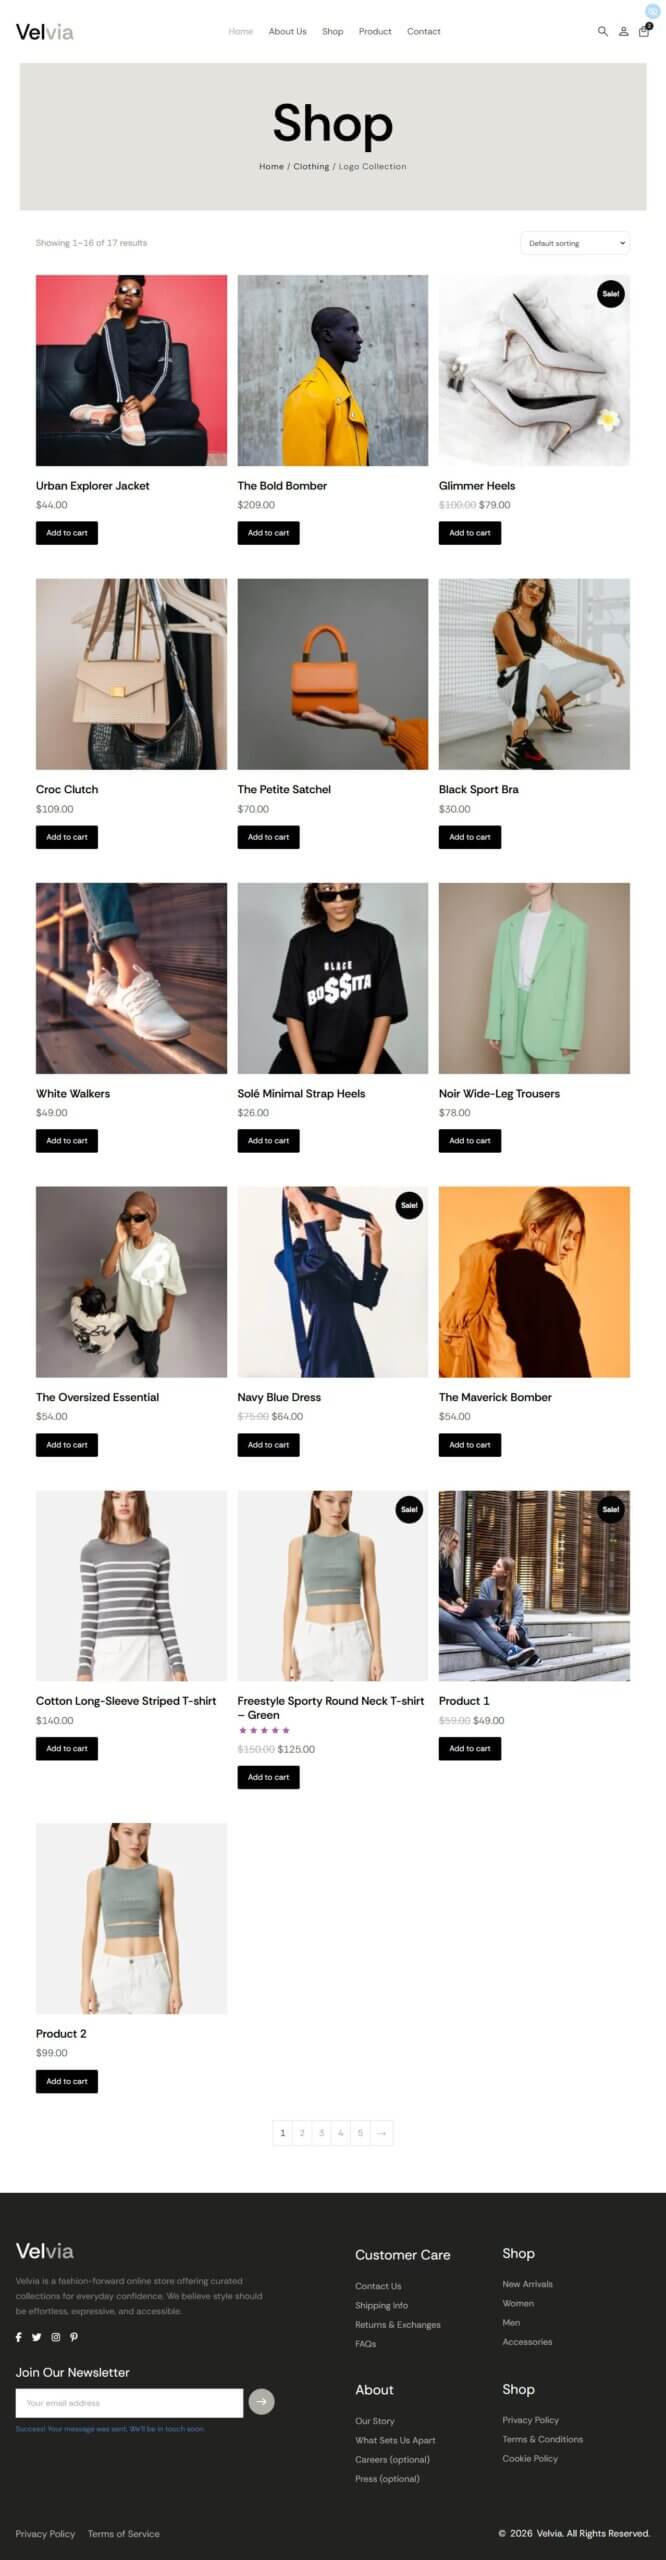
Product Archive Result Page