In WooCommerce, you have two ways to display a cart. You can use the default WooCommerce shortcode [woocommerce_cart] , which is reliable but offers limited styling options. However, if you want a cart that matches your brand’s specific aesthetic, using PixeBuilder’s elements allows you to customize every detail, from button colors to table spacing, without writing a single line of CSS.
Step 1: Assign Your Cart Page
First, ensure WooCommerce knows which page is your official checkout hub. This is a crucial step to ensure the "Proceed to Checkout" flow works correctly.
- Navigate to WooCommerce > Settings > Advanced.
- In the Page setup section, select your desired page (e.g., Custom Cart) from the Cart page dropdown menu.
- Click Save changes.

Step 2: Access the PixeBuilder Editor
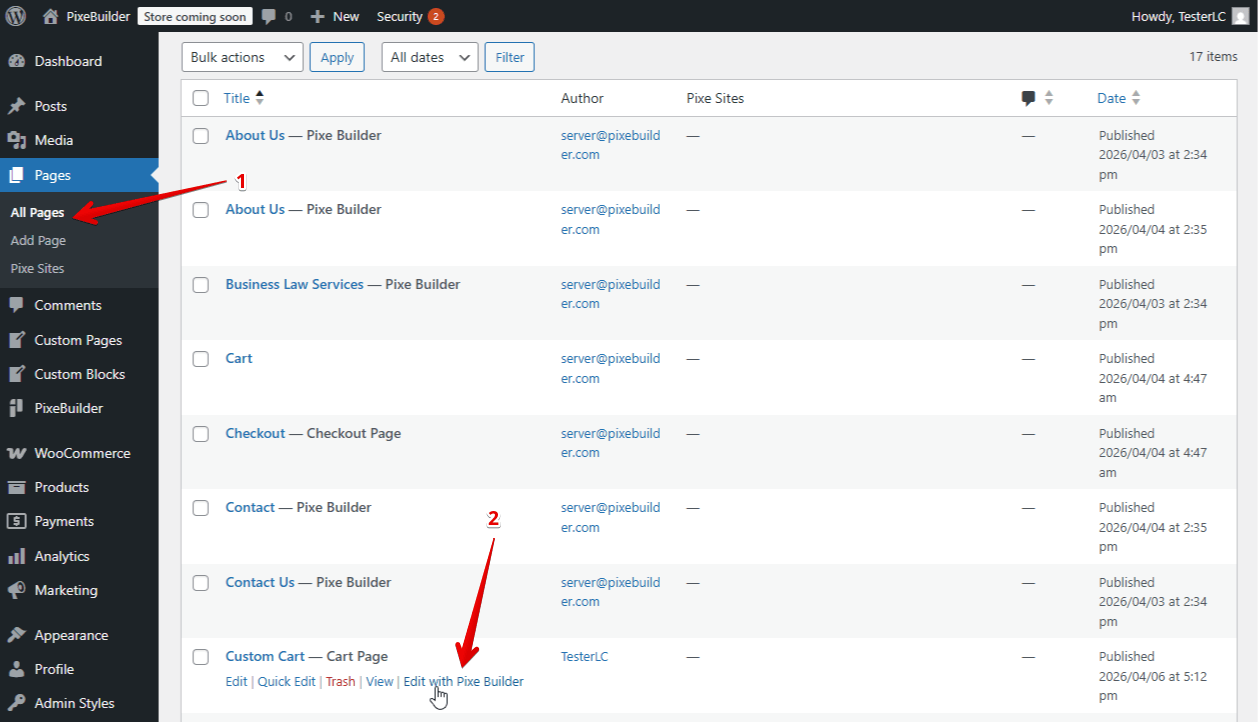
- Go to Pages > All Pages.
- Find your Custom Cart page and click the Edit with Pixe Builder link.
- Note: While both the default shortcode and our custom item work, using the PixeBuilder item gives you significantly more room to style details.
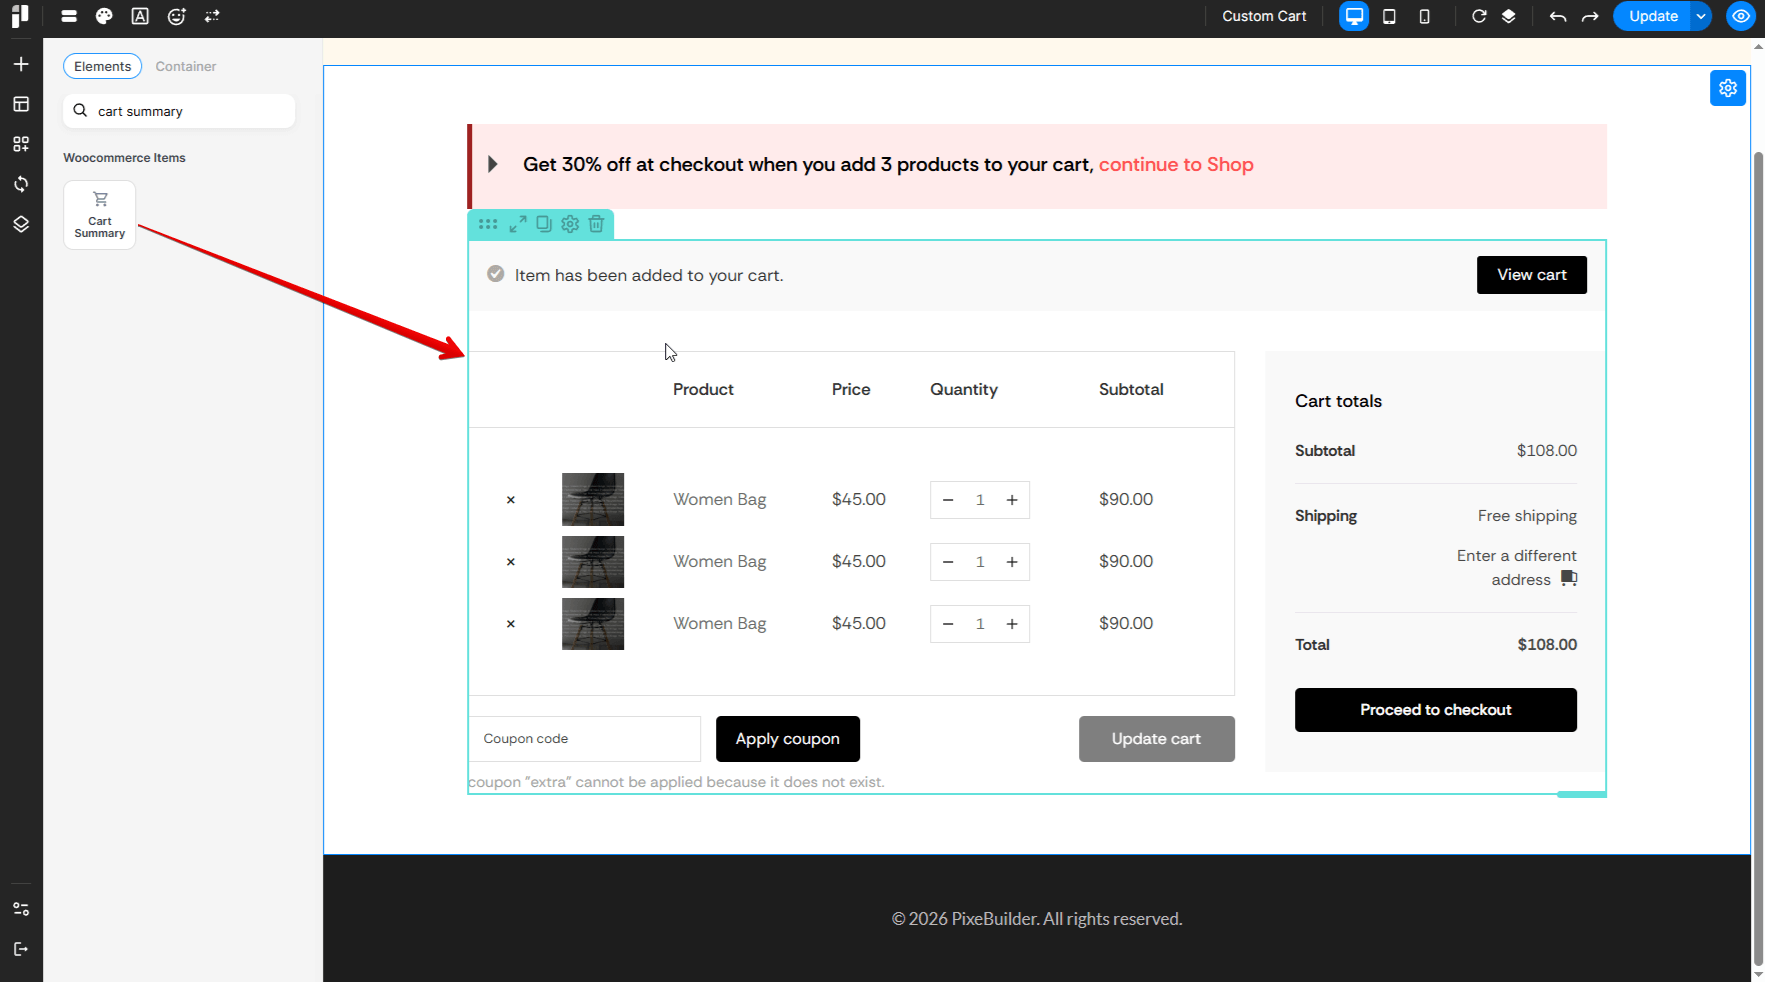
Step 3: Building the Layout
To achieve a professional, modern look, organize your elements via the Pixe Builder editor:
- Container & Column: These act as the structural shell for your content.
- Heading: Use this widget to create a custom title for your cart or special CTA.
- Cart Summary: Instead of a generic shortcode, drop in this widget. It creates the interactive product list and checkout sidebar automatically.
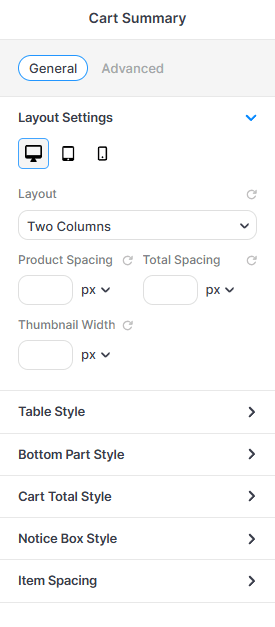
Step 4: Unlock Advanced Styling
Layout Settings
In the Layout Settings panel, you can control the structural arrangement and spacing of your cart elements to ensure a perfect fit across all devices.
Notice Box Style
The Notice Box Style settings allow you to customize how alerts and updates are displayed to your customers (e.g., discount confirmations or cart errors).
Table Style
The Table Style settings provide granular control over the product list's appearance, ensuring your cart items are clear and well-organized.
Bottom Part Style
The Bottom Part Style settings allow you to customize the functional elements located at the base of the cart table, such as coupon fields and update buttons.
Cart Total Style
The Cart Total Style settings allow you to design the "Cart totals" summary box, ensuring the final price breakdown is clear and the checkout button is prominent.
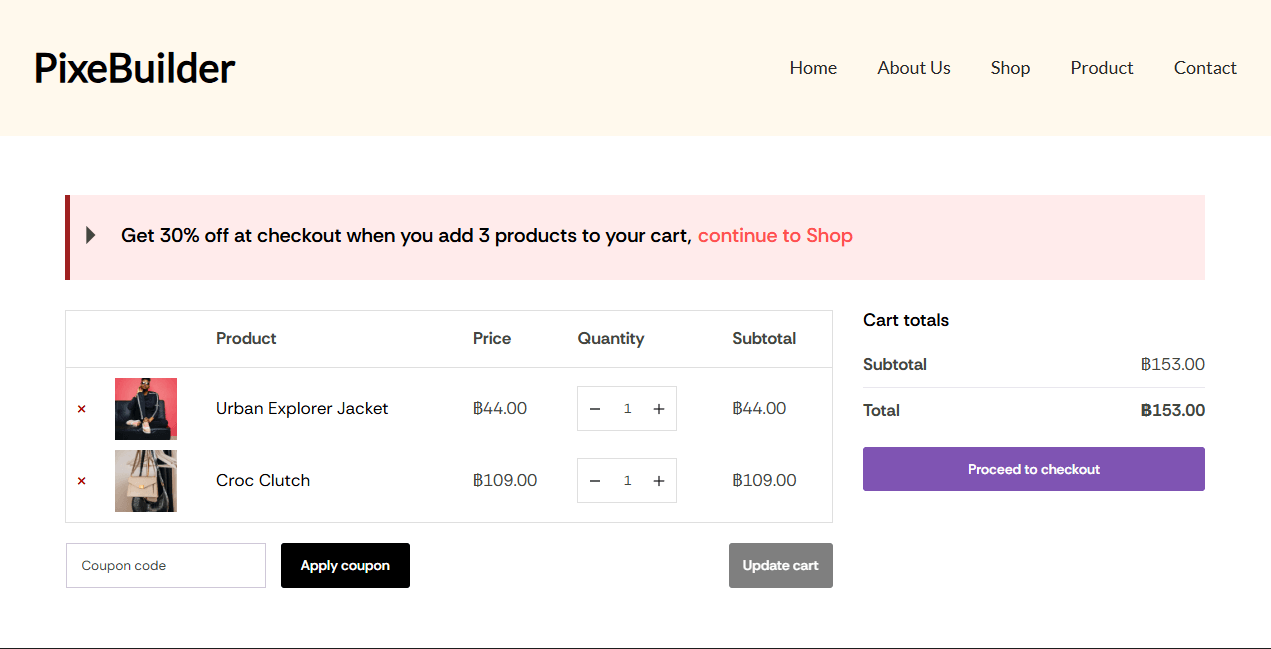
Step 5: The Result
By choosing the PixeBuilder item over the standard WooCommerce shortcode, you transform a basic functional page into a high-conversion experience. You aren't stuck with the default look; you have the freedom to style every individual component to keep your customers engaged all the way to the final click.