This guide provides a comprehensive walkthrough for creating a highly customized and high-impact My Account page using PixeBuilder. By combining the dedicated My Account element with other PixeBuilder design tools, you can transform a standard functional page into a cohesive part of your brand experience.
Step 1: Assign Your Cart Page
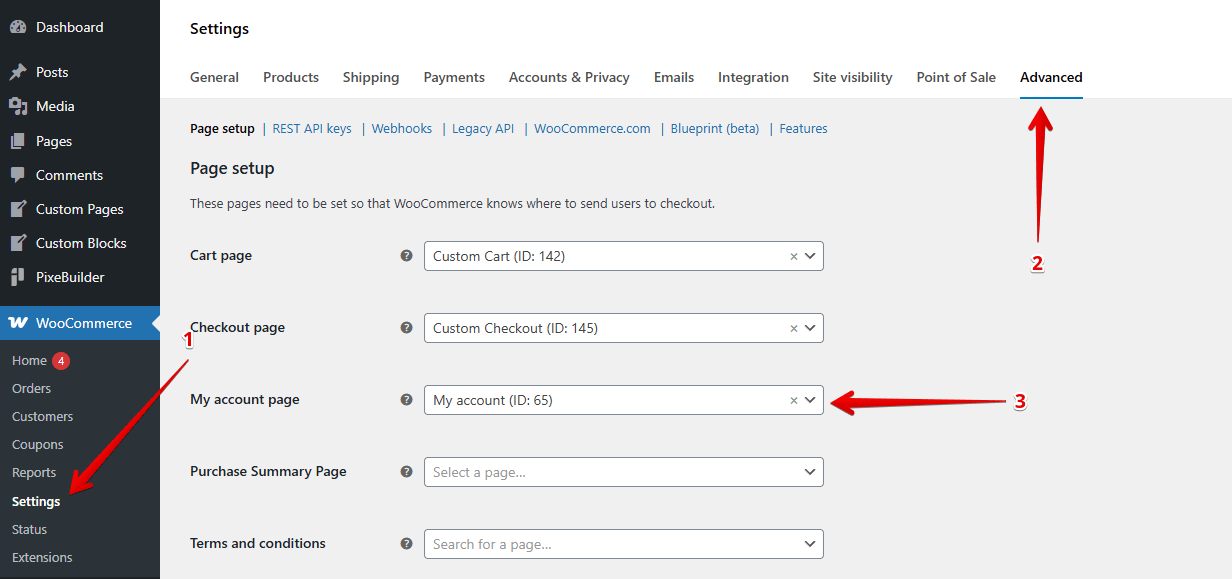
Before designing, you must ensure WooCommerce is directed to your custom page.
- Navigate to WooCommerce > Settings.
- Select the Advanced tab.
- Under Page setup, find the My account page dropdown.
- Select your desired page (e.g., "My account") and save changes.
Step 2: Access the PixeBuilder Editor
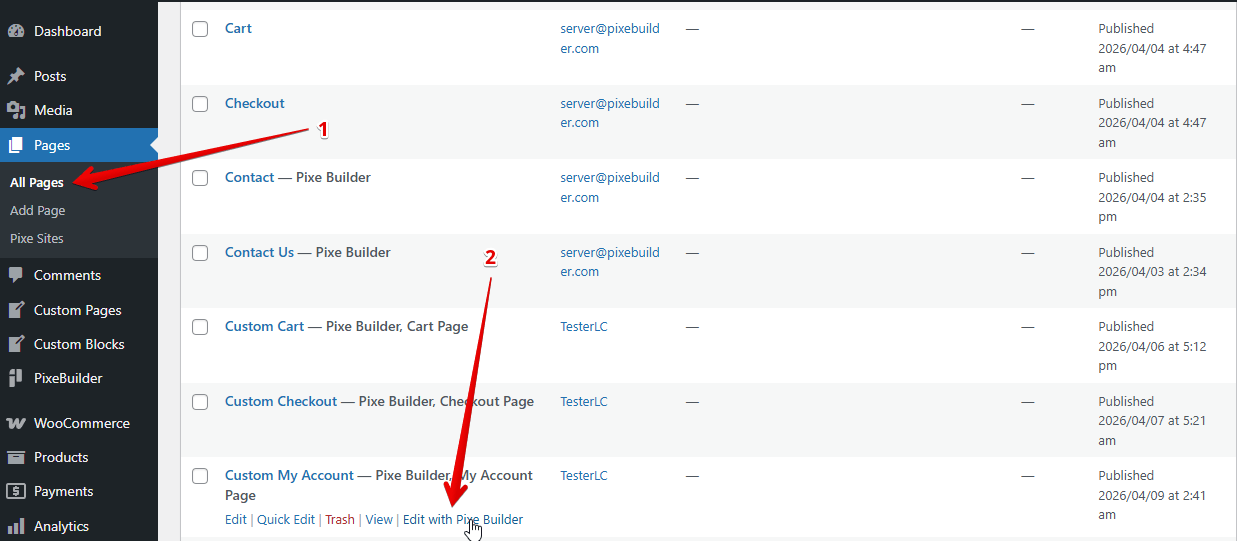
Once assigned, you can start the visual design process.
- Go to Pages > All Pages in your WordPress dashboard.
- Locate your assigned page.
- Hover over the title and click Edit with PixeBuilder to launch the visual interface.
Step 3: Building the Layout
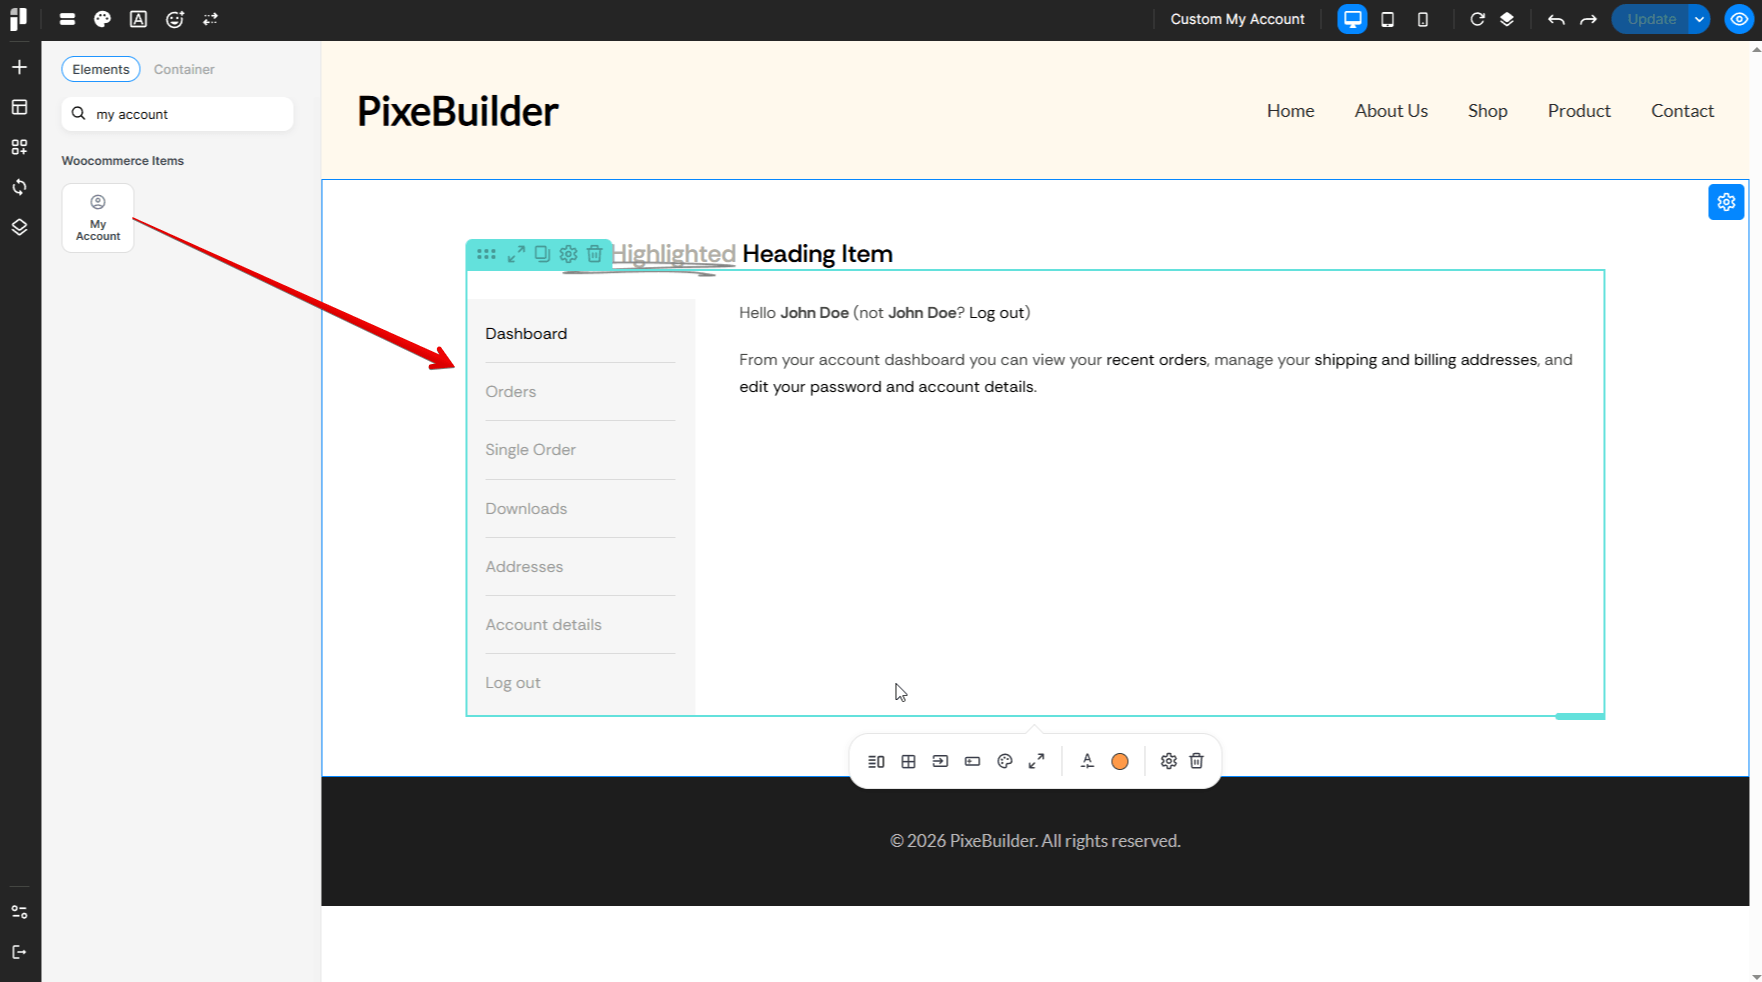
To maximize impact, don't just drop the account details on a blank screen. Use a structured layout:
- Add a Container: Start by adding a Container element to hold your content.
- Hero Section: Add an Animated Heading at the top. This allows you to greet customers with a dynamic "Hello" or highlight specific account sections to grab attention immediately.
- The Core Element: Search for and drag the My Account element into your container.
- Organization: Use the Container to keep your structure clean:
- Container
- Animated Heading
- My Account
- Container
Live Tab Preview
PixeBuilder provides a seamless editing experience by allowing you to interact with the My Account element directly within the editor.
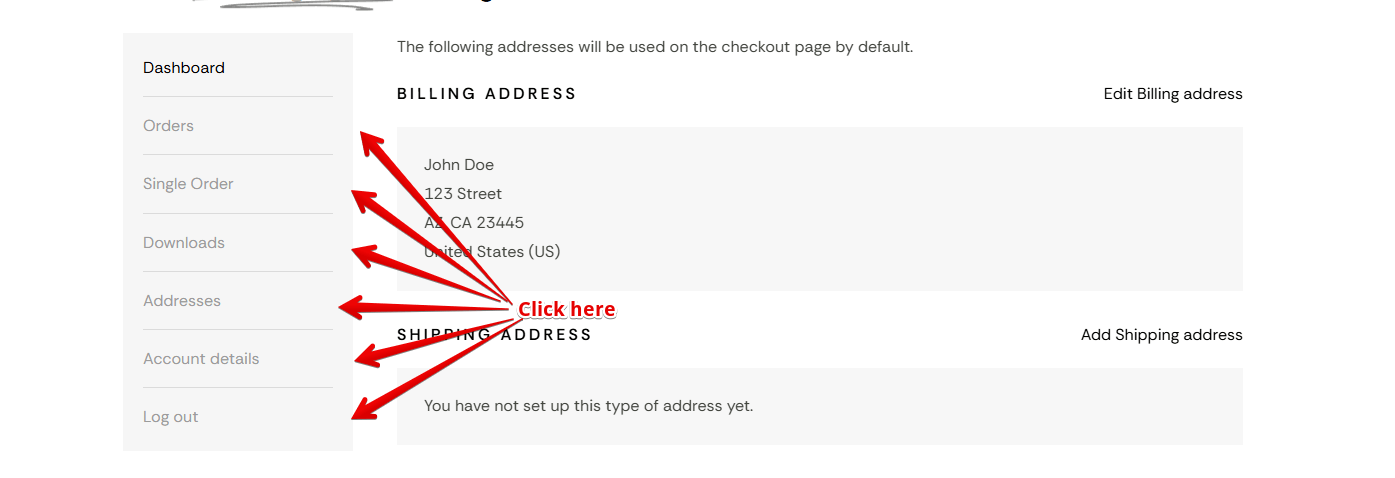
Simply click on the different tabs, such as Orders, Downloads, Addresses, or Account Details to instantly view how your custom styles are applied to each specific section.
This real-time preview ensures that your typography, table layouts, and input fields look perfect across every corner of the customer dashboard without needing to refresh the page.
Step 4: Unlock Advanced Styling
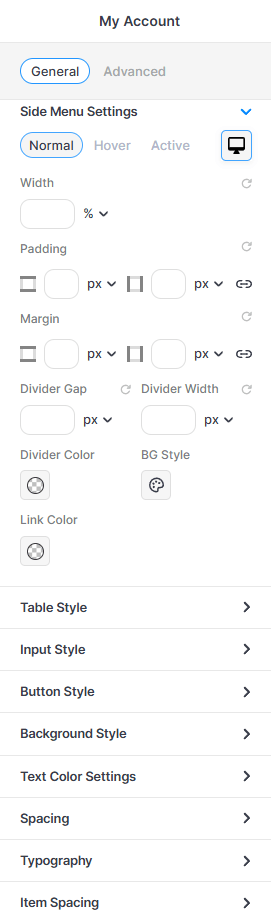
Side Menu Settings
Control the layout and appearance of the account navigation menu. You can adjust the Width, Padding, and Margin to position the menu perfectly.
Table Style
This section allows you to set the Text Alignment and provides detailed color controls for the Table Header (TH) and Table Data (TD) cells, ensuring your data is clear and professional.
Input Style
You can define the Padding, Height, and Label Color, as well as the overall Input Field Style.
Button Style
You can modify the Padding, Button Text Color, and the overall Button Style (like background or borders) for both Normal and Hover states to ensure they match your brand's call-to-action design.
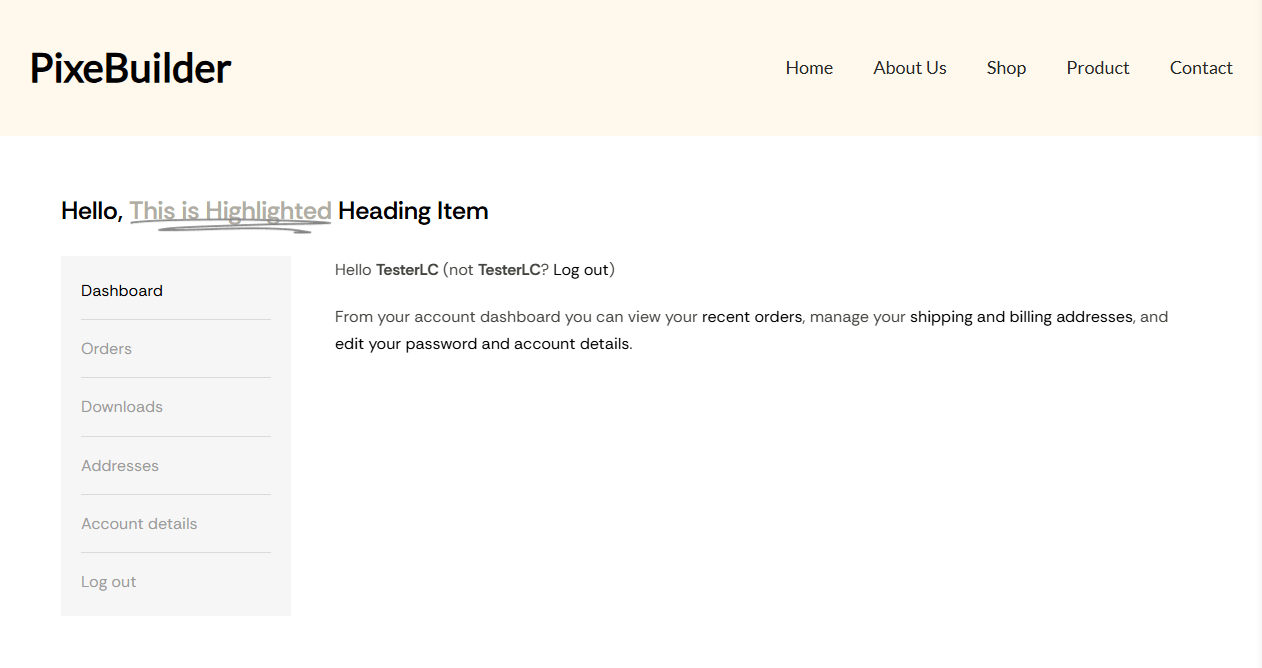
Step 5: The Result
By utilizing PixeBuilder elements like Animated Headings alongside the My Account element, you move away from the "generic" WooCommerce look.
The Advantage:
- Brand Consistency: Your account area looks exactly like the rest of your high-end site.
- Improved UX: Clearer typography and custom spacing make it easier for customers to manage their data.
- Visual Polish: Elements like highlighted headings make the page feel premium and personalized for the user.